The Custom Fonts is a premium addon provided by the Coachify Pro plugin. With this addon, you can upload your preferred custom fonts easily to your website. The uploaded fonts will be displayed across all the Typography options provided by the theme.
Activating the Custom Fonts addon #
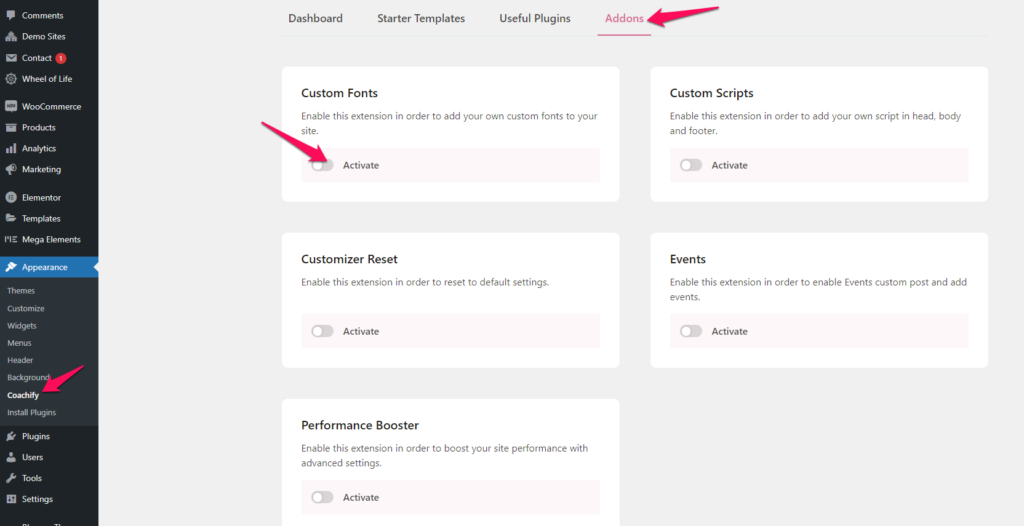
You can access the Custom Fonts addon via Admin Dashboard > Appearance > Coachify > Addons. Then click to enable the Activate option to get the Custom Fonts addon to work.
Configuring Custom Fonts Settings #
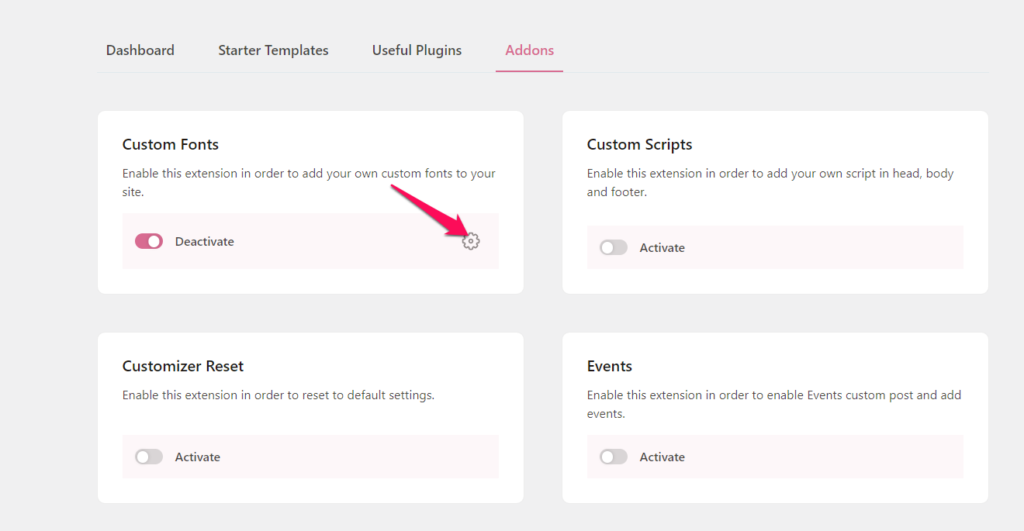
Once the Custom Fonts addon is activated, you can access the Custom Fonts settings by clicking on the Settings icon present on the same location.
Enter the font name, upload different font files you have by clicking on the Upload button and finally click on the Add New Font button to add the custom font file on your website.
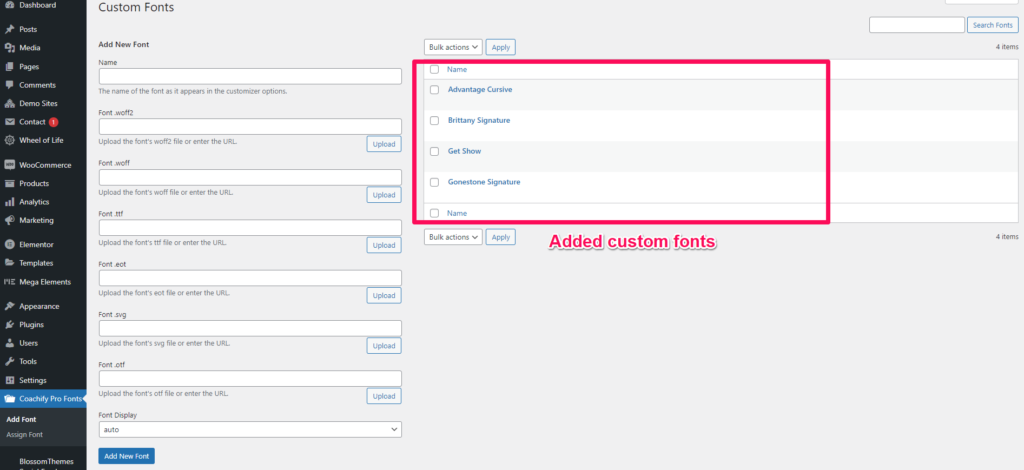
As shown above, all the fonts you upload will appear on the right.
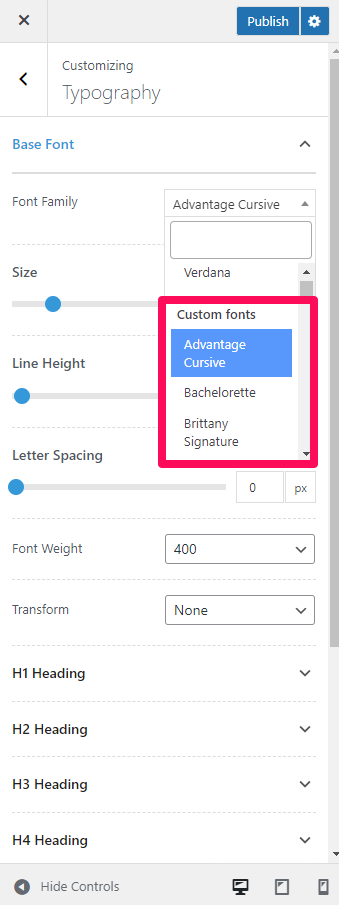
The custom fonts uploaded will now be available in the Typography settings provided by the theme including the site customizer.
You can also assign the uploaded custom fonts to different HTML elements on your website via Admin Dashboard > Coachify Pro Fonts > Assign Font.
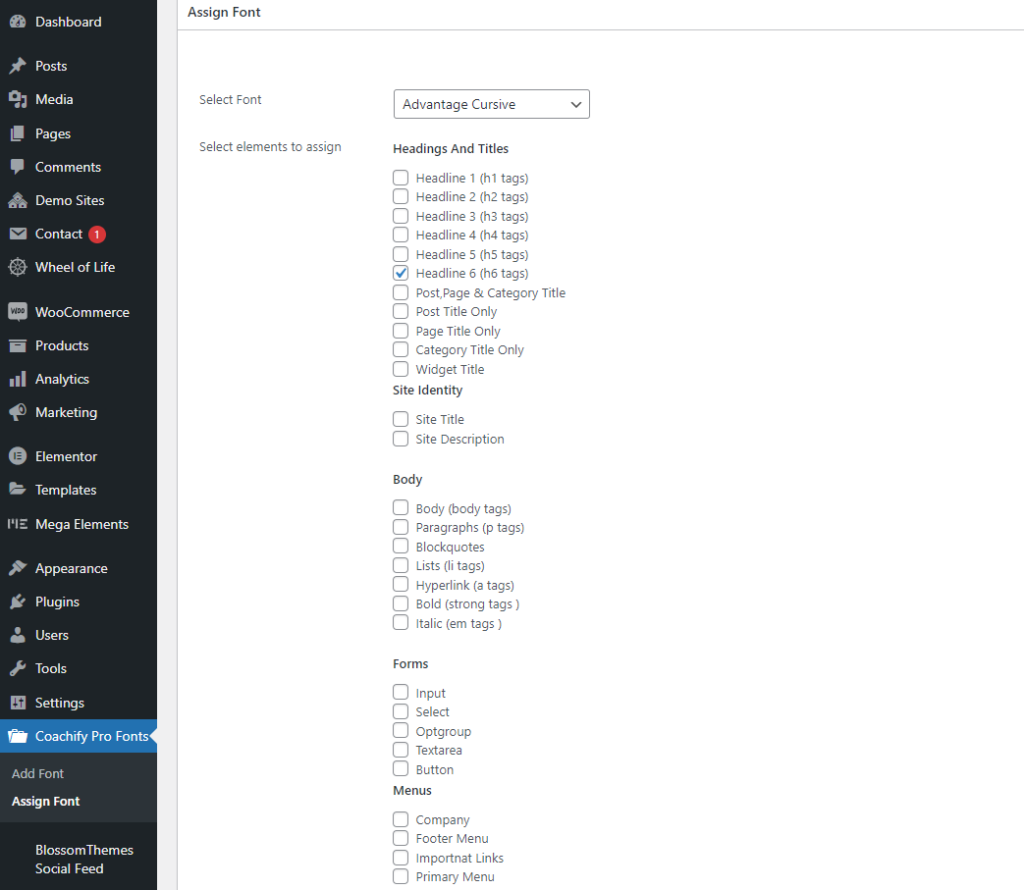
You can simply checkmark the elements to which you want to assign the selected font, and click on the Assign Font button to apply your desired font.
